

Dragons are coming over for Halloween and mine wants to join in...
Made from 18 gauge copper wire
20cms - 2 pieces for the neck and back
30cms - 1 piece for the wings
26 gauge weave wire
50cms length
Most of the images are self explanatory, but I will add instructions on each image for better clarity. Do leave comments for me to Improve.
Tutorial links for netting method and bails are added to the image comments too.
#regaliabyreyney #freejewelrytutorial #wirewrappingtutorial #wireweavingjewelry #tutorial #wireweave #jewelrymakingtips #wirewrapping #dragon #diypendant

18 gauge copper wire - 20cms
Bend it into half
Bend it into half

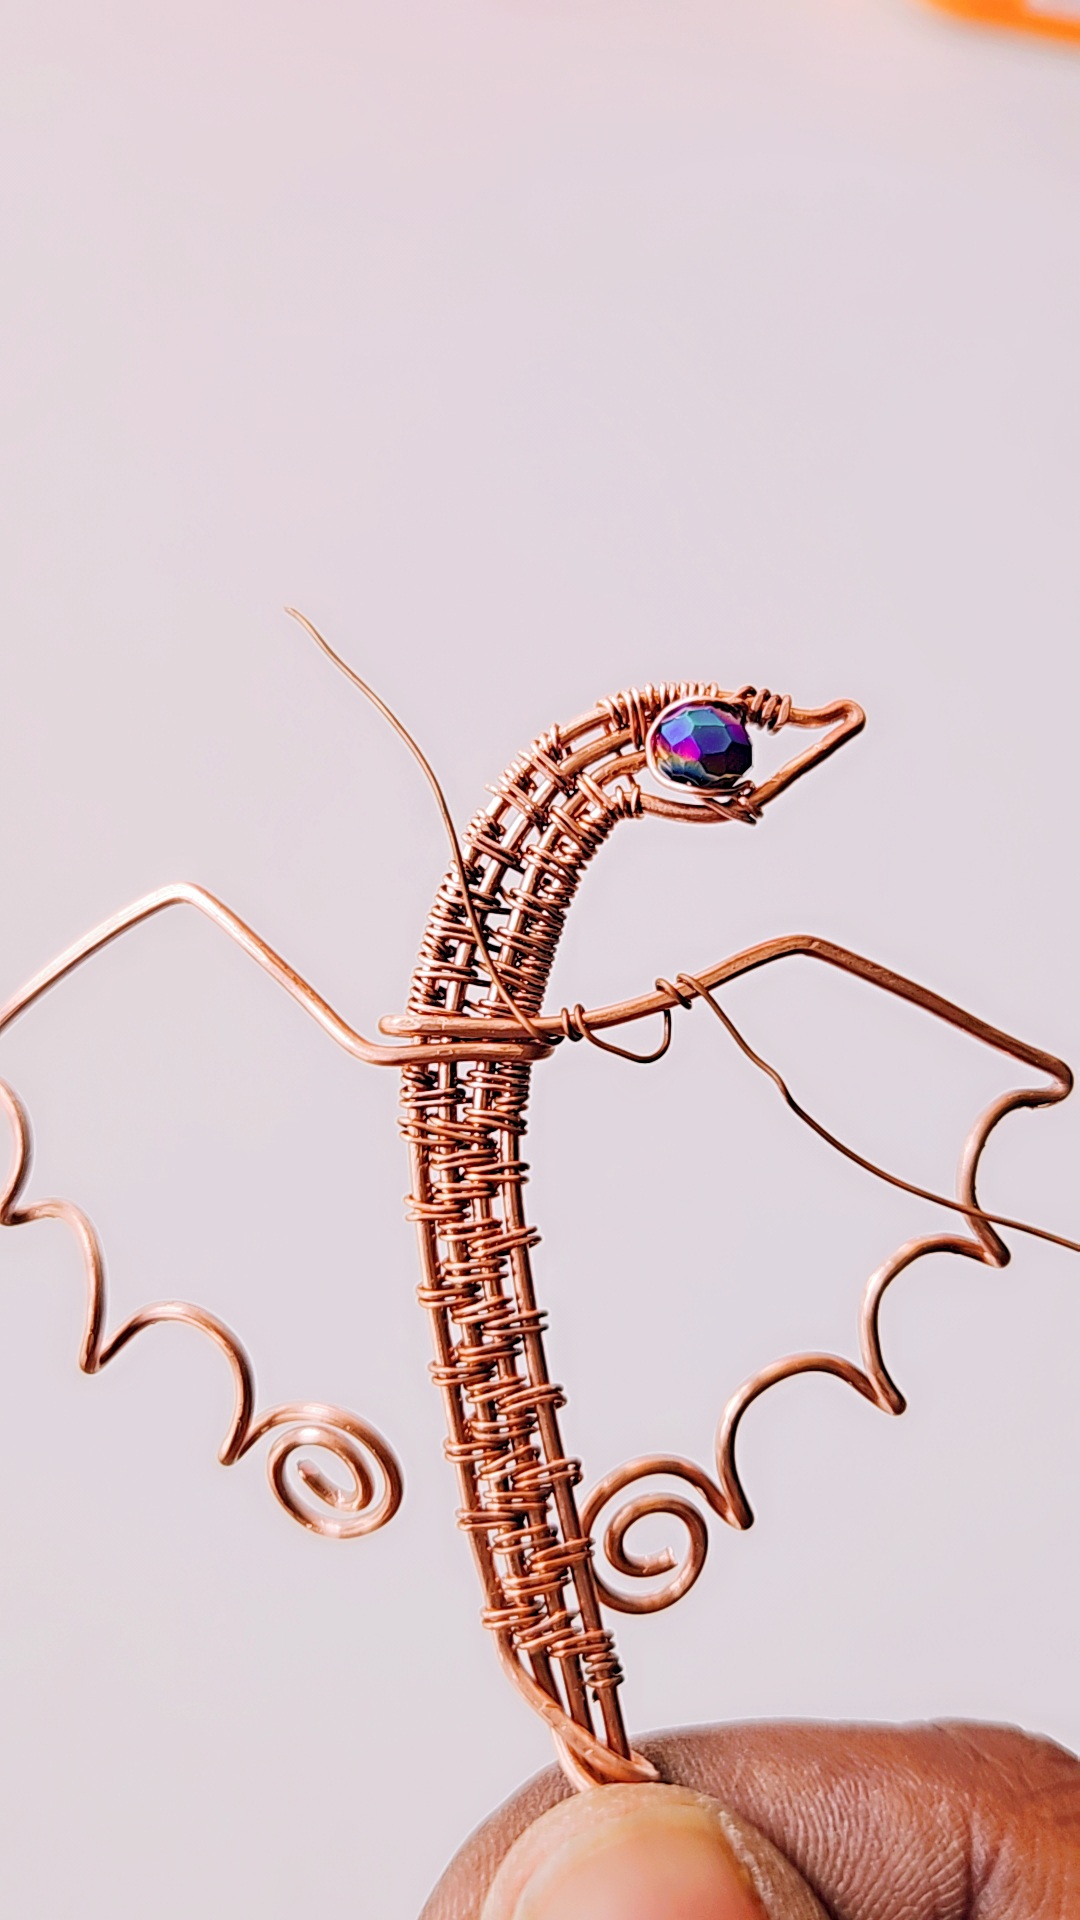
Add a 6mm crystal for the eye using 26 gauge weave wire

18 gauge copper wire 20cms bend in half again

Place it as shown

Start weaving any 4 wire weave as shown

Tutorial for the weave https://youtube.com/shorts/haPS_loH8Ck?si=J7IWvNqGd4i4Nq_9


I have added 2 different weaves, one for the neck and one for the body

I just folded the wire ends over each other and swirled the ends

18 gauge copper wire - 30cms

Fold at shown

To hold shape hammer lightly after folding

Bend both sides at 1.5 inch

And 1.5inch again

Open up the 2nd bend

And use a looping plier to make even bends

As shown

4 bends

Finish it up with a swirl in the end

Both sides

Hammer lightly. Always turn the pieces back when hammering as it will not get marred.

Hammering helps hold shape while wire weaving
26 gauge weave wire - 50cms


When you reach one end of the wing, put the wire through the body
to attach them together as shown


And pull the wire from behind to join with the other end of the wing
and start weaving again

If you are not comfortable using a big wire length, cut it into 25cms each
and then weave each wing separately.

Back look - i always like to keep a clean back look and that why it takes time.

For the 2nd round, put the wire through the 1st round of loops

Then start making the netting

It will look like this

Try keeping the netting even

Check for wire edges and tuck them away.


